
Zipped (compressed) files take up less storage space and can be transferred to other computers more quickly and easily than uncompressed files. The amount of compression varies depending on the types of files included in the zipped folder. Some types of files, including JPEG images, are already highly compressed. Because of this, zipping several JPEG images will make little difference to overall size. Here’s how to zip and unzip files in Windows 11.
How to Zip a File (Compress)
Locate the file or folder that you want to compress.
1 – Right-click on it, select “Compress to Zip file”. Windows will create a new zipped folder, with the same name as the original file or folder, in the same location.

2 – To rename it, click twice (with a slight pause) on the folder name. You can then type the new name to replace the highlighted text. Alternatively, right-click on the folder > Show more options > Rename.
3 – To add files or folders to a zipped folder you created earlier, just drag and drop them to the zipped folder.
How to Unzip Files (Extract)
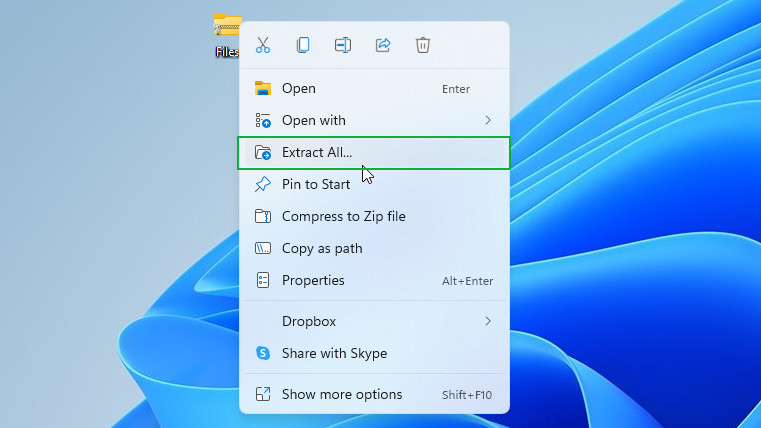
Locate the zipped folder that you want to unzip (extract) files or folders from.
1 – To unzip a single file or folder, open the zipped folder. Then drag the file or folder from the zipped folder to a new location. This will copy the file to the new location.
2 – You can also right-click on the file or files selected, then cut /copy and paste the files to a new location.
3 – To unzip the entire zipped folder, right-click the folder, select “Extract All”. Check the destination (the default is an automatically-created new folder in the same location) and then click “Extract”.
When you Zip an encrypted file using the method above, it will be unencrypted when the folder is unzipped at its destination. For most people, this won’t be a concern. But be aware of it if you deal with encrypted files a lot.