
The changes to the Start Menu and the Taskbar are probably some of the first things you noticed when moving to Windows 11 from an earlier version. Knowing how to make the most of these two important parts of Windows is an essential step to mastering the OS, and will make your everyday use of Windows 11 much easier.
Not only has the Start Menu button moved, but the whole visual design of this integral feature of Windows has been updated. In all honesty, how the Start Menu works hasn’t changed all that much, but if you are used to the Windows 10 version with its Live Tiles and a full list of installed programs, it may seem a little lacking at first glance.
In This Lesson…
Explore the Start Menu
The Start Menu can be opened by clicking on the icon in the Taskbar, or by pressing the Windows Key on your keyboard. The new Windows 11 Start Menu is split into four main sections: Search, Apps, Files, and Account.

1 – Search
Unlike the search bar in the Widgets panel, the search bar in the Start Menu is really just a link to the main search app in Windows. Click in the search field and it will immediately switch out of the Start Menu and into the search app.
2 – Apps
The apps that are displayed when you first open the Start Menu are your pinned apps (actually, they are Microsoft’s pinned apps, as you haven’t chosen to pin any yet). You can scroll up and down to see more pinned apps. The button at the top-right will take you to a full app list, an alphabetical list of all of the apps and software you have installed.
3 – Files
This is where the new Start Menu differs from the previous version. The files section is a very useful addition, as it allows you to keep a much cleaner desktop while still being able to access important and often-used files quickly. The files that are shown are marked as “Recommended”. This really just means that they are files you open a lot, or have opened recently.
The More button takes you to a longer list of files, sorted by the time and date they were last opened. You can remove files from both lists by right-clicking on the file and choosing “Remove from list”.
You can’t manually add files to either the Recommended list or the full list in the Start Menu, it is entirely based on the files you have most recently or most often opened.
4 – Account
The bottom and final section of the Start Menu will initially contain just a link to your Microsoft account details and the power button. You can, however, make this section a bit more useful by adding links to system folders (Settings, File Explorer, Music, Pictures, etc.)
Adding Folders to the Start Menu
1 – To add folder links to the Start Menu, open the main settings app and go to Personalisation > Start > Folders.
2 – Use the toggle switches here to add the folders you want to see in the Start Menu.

3 – The folders will appear as icons, directly next to the Power button at the bottom of the Start Menu.
Pin and Unpin Apps in the Start Menu
1 – To pin apps, open the full apps list, right-click on any app and select “Pin to Start” from the menu that appears.
2 – To unpin an app from the Start Menu, right-click on any pinned app icon and choose “Unpin from Start”. Simple.
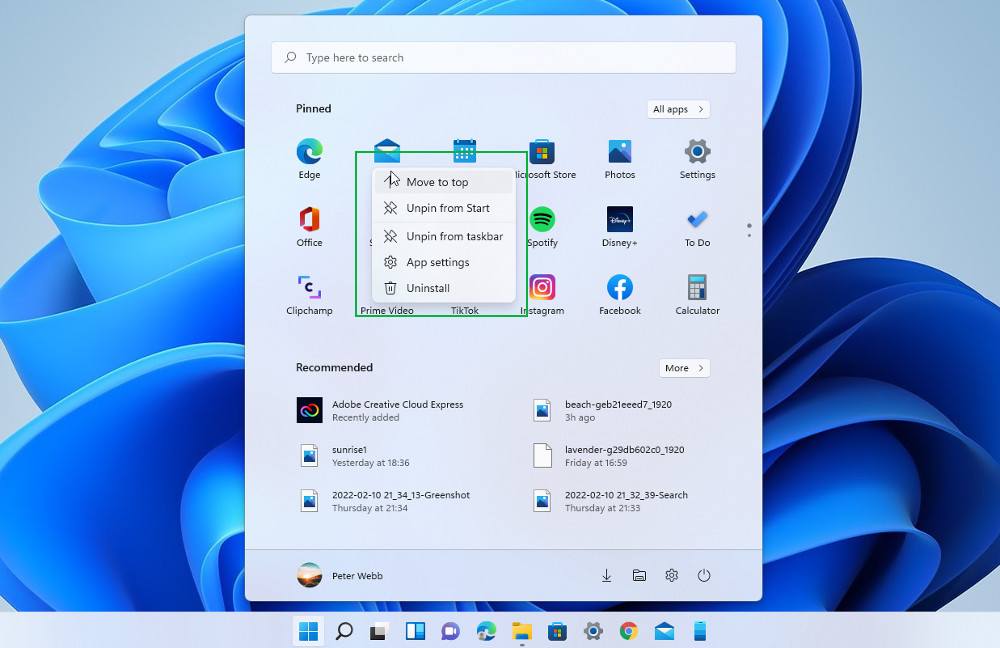
3 – Once an app is pinned, you can move it to the top of the pinned list (apps you are likely to use more often, for example). Right-click on the app and choose “Move to top”. You can also just click and drag app icons around in the pinned apps list.