
Excel gives you the option to print entire Workbooks, individual Worksheets and even partial Worksheets. While the process for printing in Excel is relatively easy, there are lots of formatting and print setup options to consider if you want your printed document to look its best. Here is a complete guide to Printing Excel Workbooks.
In The Guide…
- Printing a Single or Multiple Worksheets
- Printing Excel Workbooks
- Printing Part of a Worksheet
- Printing a Worksheet in Landscape Mode
- How to Print Excel Gridlines
- How to Define a Print Area in Excel
- Printing a Row of Column Headers on Every Page
Printing a Single or Multiple Worksheets
1 – Select the Worksheet or sheets you want to print. If selecting multiple sheets, click on the tab of the first sheet you want to print, hold Ctrl and click any other sheets you want to print.
2 – Click File and then Print, or press Ctrl + P to open the print options directly. Adjust any print settings you need to and then click the Print button.
Printing Excel Workbooks
1 – Click File and the Open. If you are printing multiple Workbooks at once, they all need to be stored within the same folder.
2 – Hold down Ctrl and click on each Workbook you wish to print in this print job. With all Workbooks selected, click Print.
Printing Part of a Worksheet
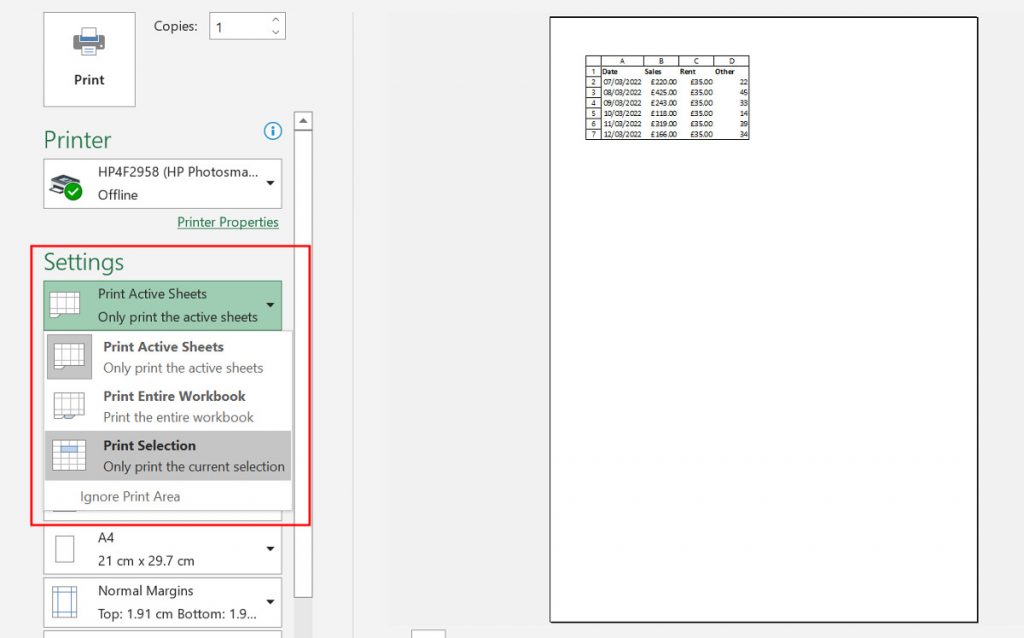
1 – Open the Worksheet and select the data you want to print. This could be a single row or column, or a larger range of data. Click File and then click Print.
2 – Click the first option in the Print settings (by default, this shows Print Active Sheets). In the menu, select the bottom option, Print Selection. Then click Print.
3 – To print just a table in your Worksheet, select a cell within the table to activate it, and then click File > Print. In the print settings, click the Print Active Sheets menu and choose the bottom option, Print Selected Table. This option only appears in the menu if a table is selected.
Printing a Worksheet in Landscape Mode
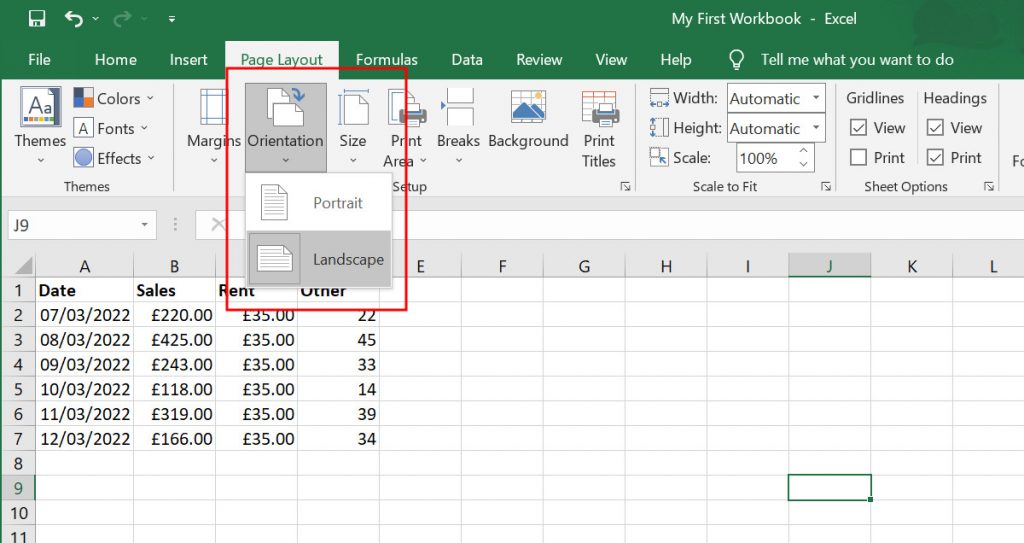
Normally, when you print an Excel Worksheet, it will be in portrait mode (taller than it is wide). You can change the print orientation in a couple of different ways.
1 – Open the Worksheet you want to print. Open the Page Layout tab and look in the Page Setup section of the Ribbon. Click Orientation and select Landscape. Then click File > Print > Print.
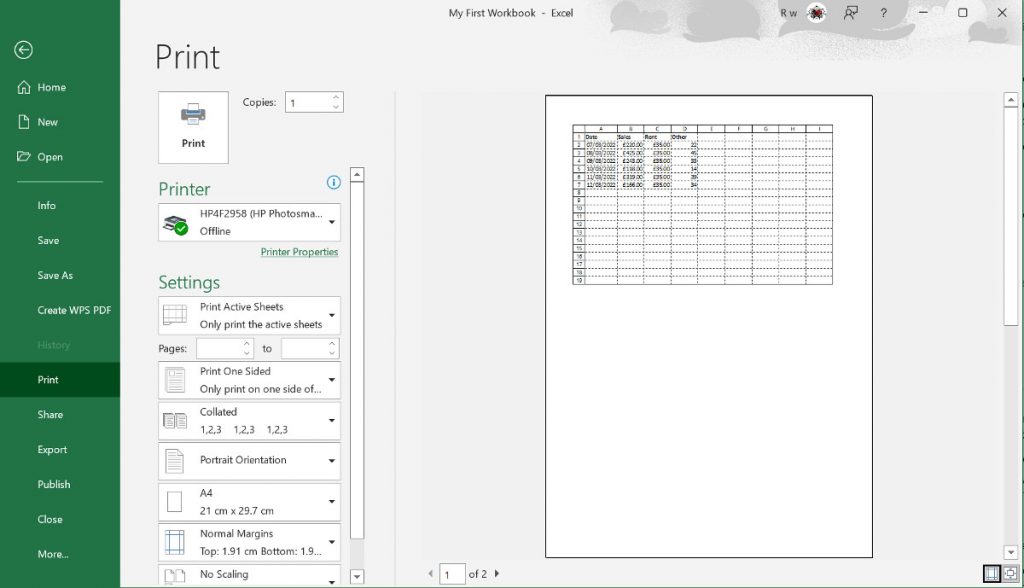
2 – You can also change the print orientation in the print settings. Open your Worksheet, click File > Print. In the print settings menu, click Portrait Orientation and change it to Landscape Orientation. The print preview will show you how this affects your sheet.
How to Print Excel Gridlines
When you print from Excel, by default the gridlines won’t be printed. This can sometimes make it hard to follow rows or columns of data. If you want gridlines to be printed, here’s how you do it.
1 – Select the Worksheet/s you want to print (hold Ctrl and click on the tabs to select more than one), and then open the Page Layout tab.
2 – In the Sheet Options section of the Ribbon, check the box for Print under Gridlines. If these check boxes are dimmed and not selectable, you may have a chart, image or other object selected in the worksheet. Cancel the selection to enable the checkboxes.
3 – Click the File tab and then click Print > Print. Reminder: You can use the keyboard shortcut Ctrl + P to go directly to the print settings page.

Gridlines will only appear around cells that contain data. If you want gridlines to appear around empty cells, you will need to define a print area around the whole section where you want gridlines to appear.
How to Define a Print Area in Excel
As mentioned above, defining a print area in a sheet will allow the gridlines to be printed around empty cells. But there are also other good reasons for defining print areas, such as printing data sets from a single sheet on separate pages.
1 – To set a print area, select the cells or cell range that you want to define as the printed area. Then open the Page Layout tab. If you want to define more than one area, hold Ctrl and then select the multiple areas.
2 – In the Page Setup section of the Ribbon, click Print Area > Set Print Area. The area/s you selected will be outlined in slightly darker borders.
3 – If you want to double-check the print areas you have defined, open the View tab and click Page Break Review in the Workbook Views section of the Ribbon.
4 – The Print Area menu in the Ribbon also contains the option to Clear Print Area. You don’t need to select your defined areas, just click anywhere in the Worksheet and click Clear Print Area.
Printing a Row of Column Headers on Every Page
If a worksheet with enough rows that it will span more than one page, you can repeat the first row of column headers on all pages. Very useful when you have large and complex worksheets.
1 – Select the worksheet you want to print and open the Page Layout tab. In the Page Setup section of the Ribbon, click the Print Titles button.
2 – In the new panel that opens, the Sheets tab should be selected (if not, select it). Depending on if you want row or column titles to be printed, type the reference of the cells that contain the headings in either Rows to Repeat at Top or Columns to Repeat at Left.
3 – If, for example, your column headings are in row 1, you can type $1:$1 to include the whole of the first row. Alternatively, click the collapse arrow in either box of the Page Setup pane, and then select the row with your mouse.
4 – Click Ok, and then print your Worksheet by going to File > Print > Print.